Introduction
The Snowflake Connector for Spark enables the use of Snowflake as a Spark data source – similar to other data sources like PostgreSQL, HDFS, S3, etc. Though most data engineers use Snowflake, what happens internally is a mystery to many. But only if one understands the underlying architecture and its functioning, can they figure out how to fine-tune their performance and troubleshoot issues that might arise. This blog thus aims to explaining in detail the internal architecture and functioning of the Snowflake Connector.
Before getting into the details, let us understand what happens when one does not use the Spark-Snowflake Connector.
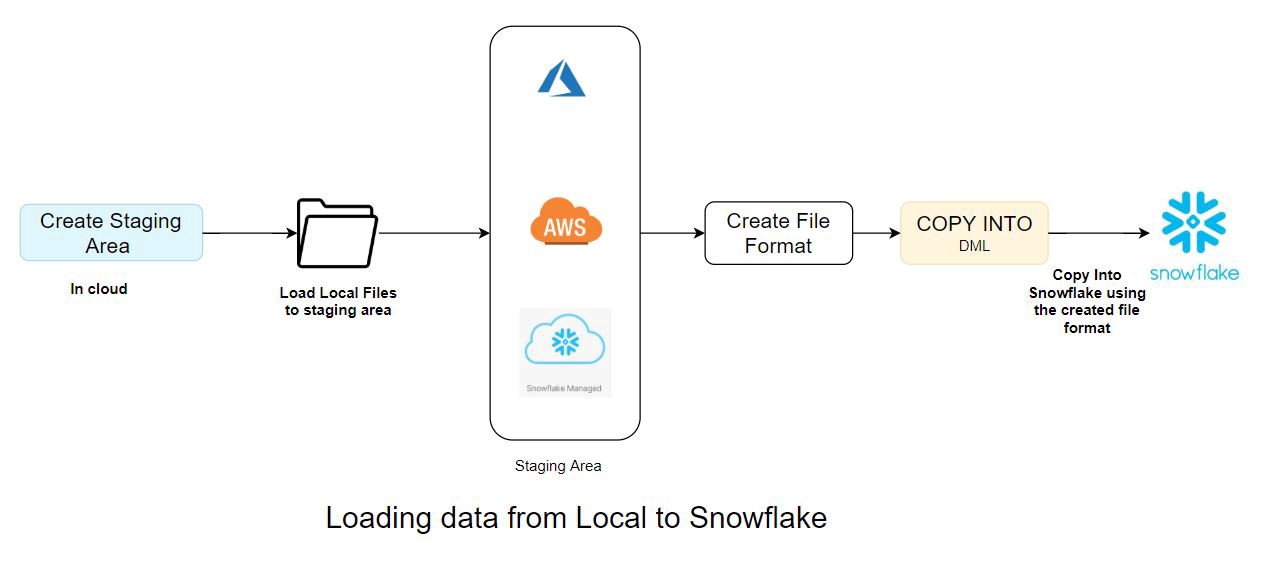
Data Loading to Snowflake without Spark- Snowflake Connector
Create Staging Area -> Load local files -> Staging area in cloud -> Create file format -> Load to Snowflake from staging area using the respective file format
Data Loading using Spark-Snowflake Connector
When we use the Spark Snowflake connector to load the data into Snowflake, it does a lot of things that are abstract to us. The connector takes care of all the heavy lifting tasks.
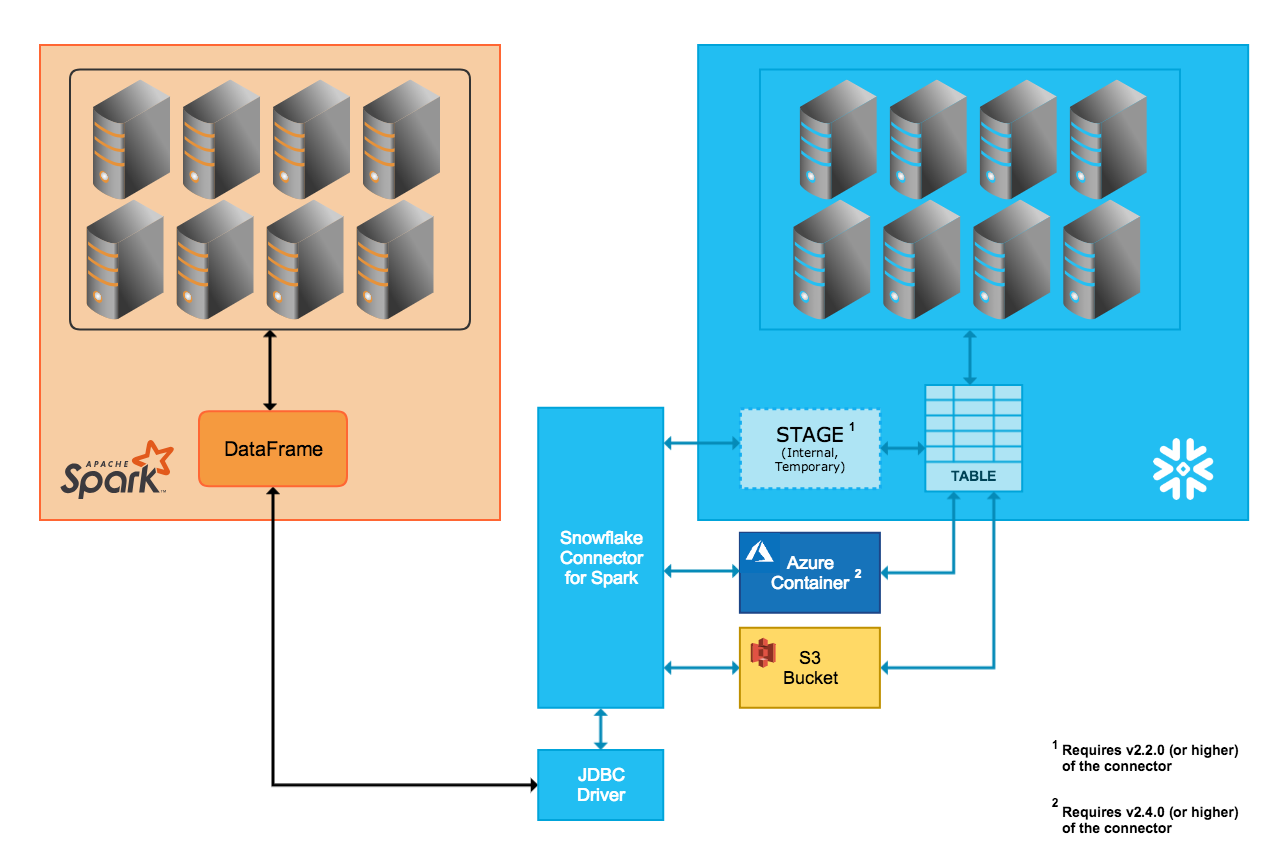
Spark Snowflake Connector (Source:https://docs.snowflake.net/manuals/user-guide/spark-connector-overview.html#interaction-between-snowflake-and-spark)
This blog illustrates one such example where the Spark-Snowflake Connector is used to read and write data in Databricks. Databricks has integrated the Snowflake Connector for Spark into the Databricks Unified Analytics Platform to provide native connectivity between Spark and Snowflake.
The Snowflake Spark Connector supports Internal (temp location managed by Snowflake automatically) and External (temp location for data transfer managed by user) transfer modes. Here is a brief description of the two modes of transfer-
Internal Data Transfer
This type of data transfer is facilitated through a Snowflake internal stage that is automatically created and managed by the Snowflake Connector.
External Data Transfer
External data transfer, on the other hand, is facilitated through a storage location that the user specifies. The storage location must be created and configured as part of the Spark connector installation/configuration.
Further, the files created by the connector during external transfer are intended to be temporary, but the connector does not automatically delete these files from the storage location. This type of data transfer is facilitated through a Snowflake internal stage that is automatically created and managed by the Snowflake Connector.
Use Cases
Below are the use cases we are going to run on Spark and see how the Spark Snowflake connector works internally-
1. Initial Loading from Spark to Snowflake
2. Loading the same Snowflake table in Overwrite mode
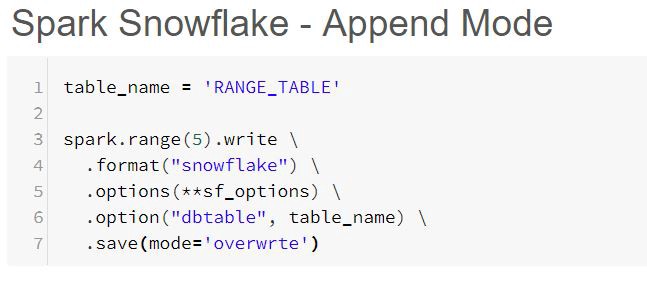
3. Loading the same Snowflake table in Append mode
4. Read the Snowflake table
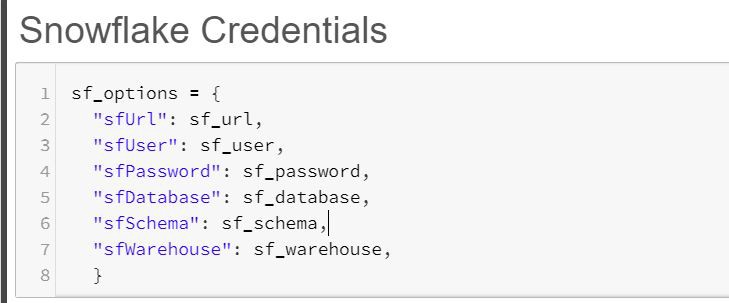
Snowflake Connection Parameters
1. Initial Loading from Spark to Snowflake
When a new table is loaded for the very first time from Spark to Snowflake, the following command will be running on Spark. This command, in turn, starts to execute a set of SQL queries in Snowflake using the connector.
The single Spark command above triggers the following 9 SQL queries in Snowflake
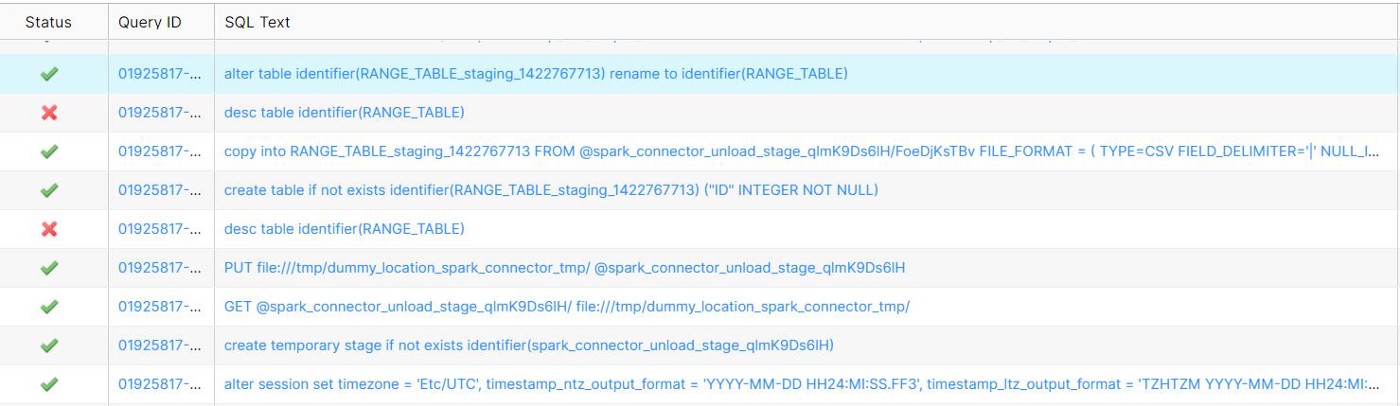
Snowflake Initial Load Query History
i) Spark, by default, uses the local time zone. This can be changed by using the sfTimezone option in the connector

ii) The below query creates a temporary internal stage in Snowflake. We can use other cloud providers that we can configure in Spark.

iii) The GET command downloads data files from one of the following Snowflake stages to a local directory/folder on a client machine. We have metadata checks at this stage.

iv) The PUT command uploads (i.e., stages) data files from a local directory/folder onto a client machine to one of the Snowflake strategies

v) The DESC command failed as the table did not exist previously, but this is now taken care of by the Snowflake connector internally. It won’t throw any error in the Spark Job

vi) The IDENTIFIER keyword is used to identify objects by name, using string literals, session variables, or bind variables.

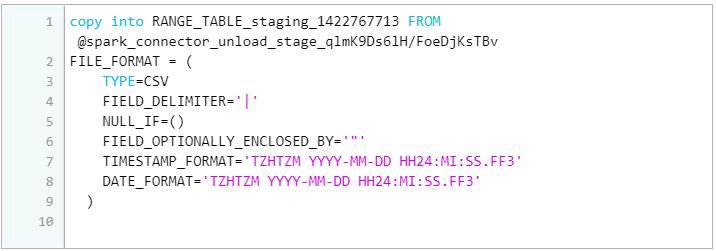
vii) The command below loads data into Snowflake’s temporary table to maintain consistency. By doing so, Spark follows Write All or Write Nothing architecture.
viii) The DESC command below failed as the table did not exist previously, but this is now taken care of by the Snowflake connector internally. It didn’t stop the process. The metadata check at this point is to see whether to use RENAME TO or SWAP WITH

ix) The RENAME TO command renames the specified table with a new identifier that is not currently used by any other table in the schema. If the table is already present, we have to use SWAP WITH and then drop the identifier

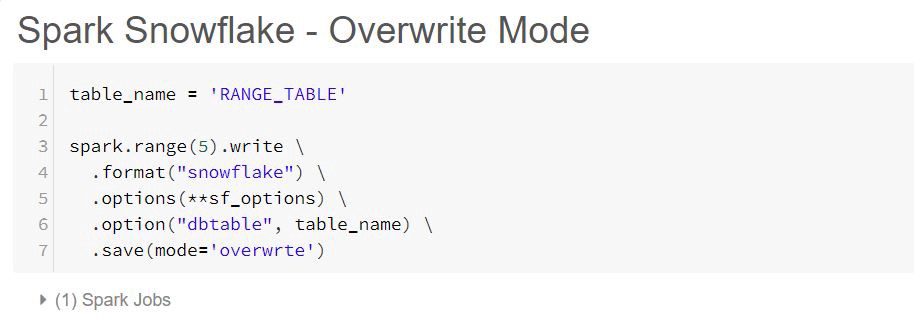
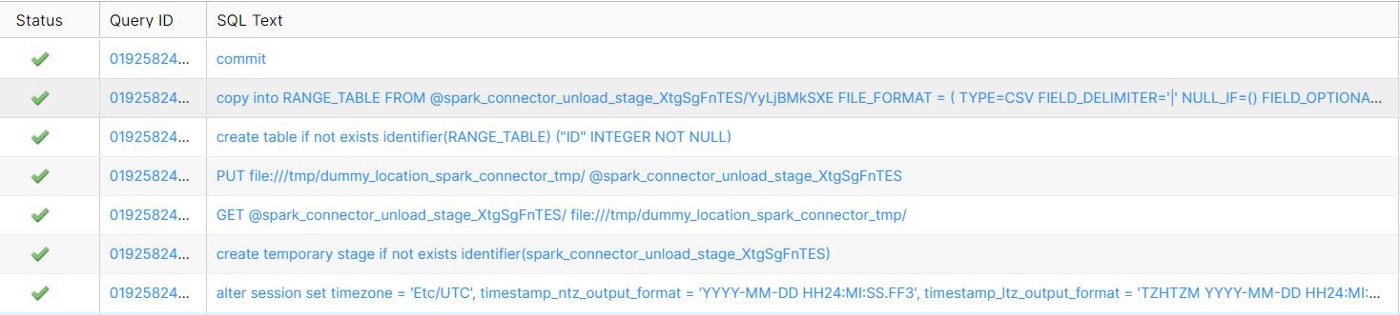
2. Loading the same Snowflake table in Overwrite mode

The above Spark command triggers the following 10 SQL queries in Snowflake. This time there is no failure when we ran the overwrite command a second time because this time, the table already exists.


i) We have metadata checks at the internal stages


ii) The SWAP WITH command swaps all content and metadata between two specified tables, including any integrity constraints defined for the tables. It also swaps all access control privilege grants. The two tables are essentially renamed in a single transaction.
The RENAME TO command is used when the table is not present because it is faster than renaming and dropping the intermediate table. But this can only be used when the table does not exist in Snowflake. This means that RENAME TO is only performed during the Initial Load.

iii) The DROP command drops the intermediate staging table

3. Loading the same Spark table in Append mode
The above Spark command triggers the following 7 SQL queries in Snowflake.


Note: When we use OVERWRITE mode, the data is copied into the intermediate staged table, but during APPEND, the data is loaded into the actual table in Snowflake.

i) In order to maintain the ACID compliance, this mode uses all the transactions inside the BEGIN and COMMIT. If anything goes wrong, it uses ROLLBACK so that the previous state of the table is untouched.

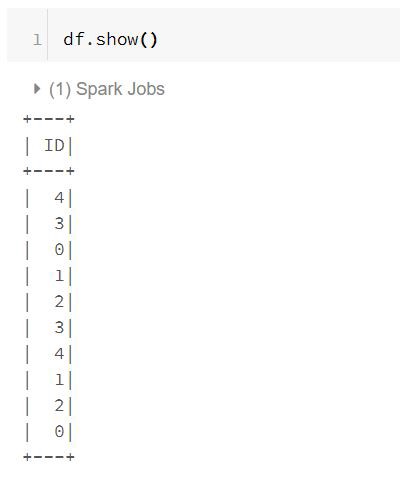
4. Reading the Snowflake Table
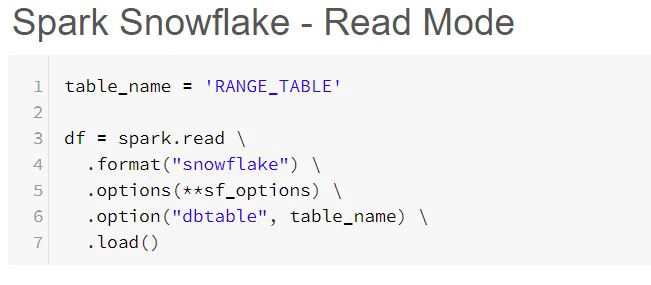
The above Spark command triggers the following SQL query in Snowflake. The reason for this is that Spark follows the Lazy Execution pattern. So until an action is performed, it will not read the actual data. Spark internally maintains lineage to process it effectively. The following query is to check whether the table is present or not and to retrieve only the schema of the table.

The Spark action below triggers 5 SQL queries in Snowflake
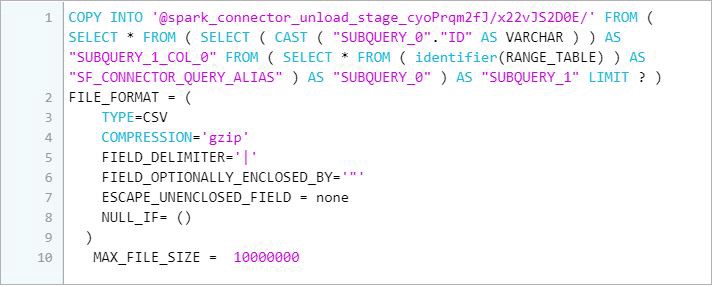
i) First, it creates a temporary internal stage to load the read data from Snowflake.

ii) Next, it downloads data files from the Snowflake internal stage to a local directory/folder on a client machine.

iii) The default timestamp data type mapping is TIMESTAMP_NTZ (no time zone), so you must explicitly set the TIMESTAMP_TYPE_MAPPING parameter to use TIMESTAMP_LTZ.

iv) The data is then copied from Snowflake to the internal stage.
v) Finally, it downloads data files from the Snowflake internal stage to a local directory/folder on a client machine.

Wrapping Up
Spark Snowflake connector comes with lots of benefits like query pushdown, column mapping, etc. This acts as an abstract layer and does a lot of groundwork in the back end.
Happy Learning!!